When you are preserving a family heirloom or displaying a new print, framing is a blend of art and engineering. Small errors in material choice or technique can lead to permanent damage or a finish that looks… “homemade”. This guide outlines the critical pitfalls to avoid for a professional framing result.
The most common mistakes often happen before the first cut is even made. Achieving a professional result requires understanding how materials interact with your art over time.
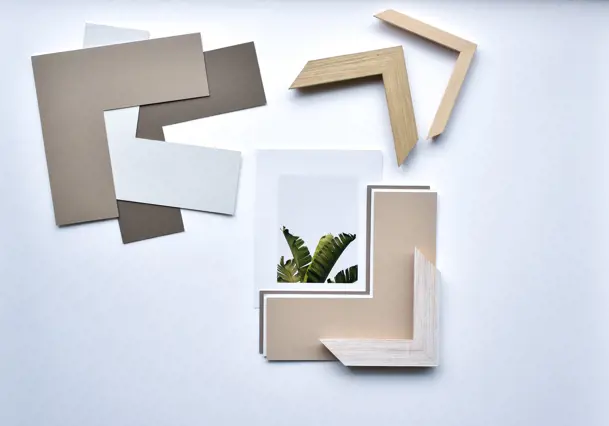
1. Material Pitfalls and Acidic Components
Using non-archival materials can lead to acidic migration, a chemical process that destroys artwork over time.
Non Acid-Free Matboards
Standard cardboard or low-grade matboards contain lignin. As this organic compound breaks down, it creates "acid burn” - a permanent brown stain that appears along the bevelled edge of the window. To prevent this, always opt for Alpha-Cellulose or Cotton Rag boards.
Non Acid-Free Backing Boards
It is critical to avoid using MDF, shipping cardboard, or standard Coreflute as a backing material. MDF off-gasses formaldehyde, while the internal structure of corrugated cardboard can leave "ghost" lines on the back of your art. Instead, use acid-free foam core for a stable, inert foundation. Not only is it safer for your artwork, but it is also much easier to work with and cut.
At Frame Today, we offer a variety of acid-free mat and backing boards.

2. Choosing and Handling Glass
Glass is more than just a transparent cover; it acts as a protective barrier and an optical lens for your art.
Standard Window Glass vs. Framer’s Float Glass
Standard hardware store glass often has a high iron content, which results in a noticeable green tint that muddies the colours of your artwork. In contrast, Framer’s Float Glass is manufactured to be optically flatter and neutral in colour for significantly better clarity.
If your artwork is going to hang in direct sunlight or under reflective lights, consider UV or non-reflective glass.
Glass Comparison
Feature | Standard Glass | Framer’s Float Glass |
Colour Cast | Often noticeably green | Neutral/Clear |
Surface | May have ripples or "seeds" | Optically flat |
Purity | Industrial grade; may have residues | Cleaned and inspected for framing |
Best Use | Not recommended | Standard framing for professional results |
Direct Contact and Cleaning Errors
A major preservation mistake is allowing the glass to touch the artwork directly, as moisture can trap and fuse the two together. Furthermore, never spray glass cleaner directly onto the glass; spray a microfiber cloth first to avoid over-spray and to prevent the liquid glass cleaner from seeping into the frame and damaging the mat or art.

3. Miscalculating Mat and Frame Measurements
A common DIY framer's error is forgetting to account for the overlap. If you cut a mat window to the exact size of your 8x10 photo, the photo will fall right through the hole.
Ensure the mat opening is at least 4mm smaller than the artwork on all sides so the mat can securely hold the edges of the image.

4. Cutting Mats and Mitres
Precision cutting is what separates a "craft project" from a professional piece of framed decor. Achieving millimetre-perfect cuts requires the right techniques, tools and precision equipment.
Mastering the Bevelled Edge
A professional mat should feature a 45-degree inward bevel. Using a dull blade or cutting the bevel in the wrong direction (backward) are common errors that ruin the look. To ensure a crisp, "fuzz-free" edge, change your blades after every 2 to 3 mats cut.

Avoiding Overcuts and "Hooks"
Sliding your blade past the corner (an overcut) leaves visible slits on the mat face. Use the "start and stop" markers on your mat cutter and always place a slip sheet or sacrificial board underneath your mat board for a cleaner finish to your cut.
All Frame Today stores use a computerised mat cutter which ensures a perfect mat cut, every time.
Cutting Corners (Drop Saws vs. Guillotines)
Power drop saws often suffer from "blade wobble," which leads to unsightly gaps in the corners. Professional guillotines (like a Morso guillotine we use) shave the wood for a glass-smooth finish. If you are using a saw at home, high-tooth-count blades and matching wax fillers are essential for hiding DIY gaps.

5. Window vs Float Mounting
How you secure the artwork inside the frame determines its longevity and visual impact.
While a window mount is classic for hiding messy edges, a float mount is ideal for showcasing deckled edges or textured paper. If you choose to float your art, you must use frame spacers to create the depth required to keep the glass at a safe distance from the artwork or object.
Mounting Comparison
Feature | Window Mount | Float Mount |
Edge Visibility | Hidden behind the mat | Fully visible |
Visual Style | Traditional, structured, clean | Contemporary, gallery-style, organic |
Paper Requirement | Works for any paper weight | Better for thicker, higher-quality paper |
Difficulty Level | Easier for DIY (hides mistakes) | Requires precision centering and hinging |
Primary Goal | Focuses the eye on the image | Focuses on the artwork as an object |
The T-Hinge Technique
When attaching your artwork to the matboard, avoid the temptation to tape all four sides of your artwork. Paper naturally needs to "breathe" and expand with humidity. Using the T-Hinge method (hinging only from the top) minimises unsightly buckling and rippling over time.

6. Handling Flexi-Points and Retaining Hardware
One of the most common, and most frustrating, DIY framing accidents has nothing to do with cutting or measuring. It happens the moment you open a ready-made frame.
Most ready-made frames use flexi-points (also called push points or frame points) to hold the backing board and glass securely in place. These small, flat metal tabs are pressed into the inner lip of the frame rebate using a special point driver tool. They do their job well, but they are positioned very close to the edge of the glass, and when you lever them up or press them down carelessly, it takes only a fraction of a millimetre of flex to send a crack running across your glass.
The Flexi Point Trap
The typical scenario goes like this; you flip the frame over, begin lifting a flexi point with a screwdriver, the tool slips, and the glass cracks. Or in reverse; you are pressing the points back down to seal the frame and you apply just a little too much pressure. Either way, you are left with a ruined piece of glass and, worse, potentially shattered fragments near your artwork which can cause permanent damage.
To avoid this, always remove the glass before you begin working with the retaining hardware. Flip the frame face-down on a clean, padded surface, remove the backing board first, and then carefully lift the glass straight out without touching any of the flexi points. When reassembling, reverse the process - set the glass then backing board in and carefully press the flexi points down using firm, straight downward pressure only, keeping your tool perpendicular to the frame to avoid any sideways force against the glass edge.
A few additional precautions worth keeping in mind:
- Work on a soft, flat surface - a folded towel or foam mat beneath the frame face prevents the glass from rattling or shifting while you work on the back.
- Replace rather than re-bend - althought Flexi points are re-usable, they are also inexpensive and re-bending an old point increases the risk of it snapping and sending a jolt into the glass.
- Wear safety glasses - if glass does crack, it can do so suddenly and with force. This is a simple precaution that is easy to skip and regret.
7. Meticulous Assembly
The final assembly phase requires a meticulous approach to ensure the internal environment of the frame remains pristine and free of contaminants.
Eliminating Dust with an Anti-Static Brush
One of the most frustrating moments in DIY framing (or even professional framing for that matter) is finishing an assembly only to find a stray hair or dust particle trapped behind the glass. Using a dedicated anti-static brush is essential for removing these contaminants without introducing new ones or creating a static charge that attracts more debris. Unlike standard cloths or compressed air, which can often shift dust around or leave behind lint, an anti-static brush gently lifts away particles while neutralising the static electricity on the glass and mat board.
Incorporating a final "sweep" with an anti-static brush (while wearing cotton gloves of course) ensures your artwork's environment remains pristine before the frame is permanently sealed.
8. Final Handling and Placement
The final steps are often the most overlooked but are vital for a pristine finish.
Handle With Care
Handling glass or art with bare hands leaves skin oils that can oxidize over time. Use cotton gloves during the final assembly phase to ensure the inside area of the frame (art and glass) remains pristine.
Lighting and Environment
Even with high-quality materials, hanging art in direct sunlight will result in fading eventually. Choose a wall with indirect light to preserve the pigments for years to come.
Final Thoughts
Before you begin your next framing project, take a moment to think about why you are framing this specific piece. Is it a memory you want to hold onto? A valuable investment? Or perhaps a gift for someone special? If the piece is important to you in any way, framing it right is essential to ensure it survives the test of time. After all, if it isn't worth protecting properly, is it really worth framing at all?
Professional framing is more than just looks; it's about controlling the environment inside the frame. By choosing pH-neutral materials and ensuring no physical or chemical stress is placed on the art, you can achieve a result that looks beautiful and lasts a lifetime. If you find the DIY process a bit daunting or want to ensure your most precious pieces get the gallery treatment they deserve, we are here to help. Visit any Frame Today store and speak with our expert consultants who can guide you through the best framing options for your artwork or item.