Updated 31 August 2026
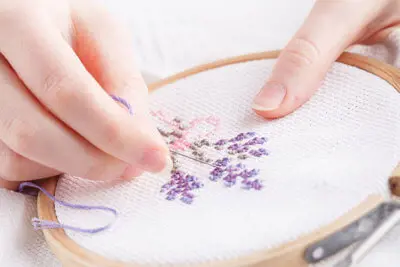
DIY arts continue to increase in popularity as a cost-effective way to learn a new skill and to decorate one’s home. Cross stitch is a beginner-friendly craft whose final look can be completely customised, ranging from naturescapes to phrases. Whether it's a cross stitch kit, created from scratch, or the work of an artist, cross stitch art is definitely worthy of a frame.
Made from a unique combination of fabric and thread, cross stitch pieces are thicker often more challenging to frame than paper artwork. Framing it properly means it will last well into the future and be presented like a true piece of art, celebrating the true details and dedication that went into it.
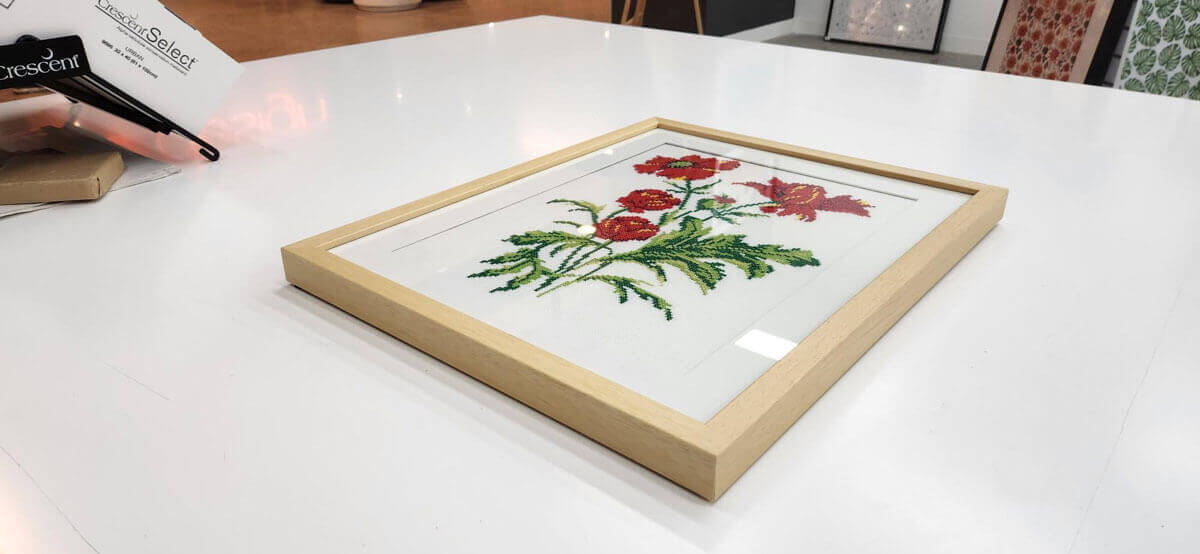
You can frame a cross stitch yourself at home, and we'll walk you through exactly how below. But because of the materials and medium involved, an expert eye makes for safer, longer-lasting results - so we'll also cover when it's worth handing it over to a professional framer.
Materials You'll Need for DIY Cross Stitch Framing
Before you start, you will need:
- Your finished, washed and ironed cross stitch
- A picture frame (with enough depth/rebate for your chosen mount method)
- Acid-free foam core board (also called foam board or mount board), cut 4 mm smaller than the frame opening
- Acid-free backing or kraft paper
- Mat board or spacers (to keep the fabric off the glass)
- Glass or acrylic glazing (optional but recommended)
- Stainless steel nickel head pins (flat head, non-rusting)
- Acid-free framer's tape if you're using the taping method
- Sharp scissors, a steel ruler, and a craft knife
- An erasable fabric marker (never a regular pen) for finding centre points
Step 1: Prepare the Cross Stitch for Framing
Begin by removing the piece from the frame or hoop it was worked in. Once free, prepare it for framing:
- Iron out creases left by the hoop or frame - always iron face-down on a towel to protect the stitches, using a low, dry heat setting suited to your fabric (cotton, linen or evenweave).
- Straighten the fabric border so the weave runs square, not on an angle.
- Trim any fraying threads from the stitch work, taking care not to cut into your stitching.
- Hand-wash the piece gently to remove dust, oils or marks, then lay it flat to dry.
Once your cross stitch is clean, pressed and square, decide on the finished look - the shape, proportions, and how much fabric border you want visible around the design. As a rule of thumb, leave at least 3–4cm of excess fabric on all sides of the design so you have enough to pin or lace over your mounting board.
Step 2: Mount and Stretch the Fabric
This is the step most DIY guides skip over, and it's the one that makes the biggest difference to how your finished piece looks. Cross stitch fabric needs to be pulled taut and square before it goes into a frame, or you'll end up with visible wrinkles, bagging, or a design that sits crooked behind the glass.
There are two common home methods:
Method 1: Pinning (best for a professional, drum-tight finish)
- Cut your foam core board so it fits inside the frame rebate with a couple of millimetres of clearance on each side.
- Find the centre point of both the board and your design - fold each in half both ways, or draw diagonal corner-to-corner lines with your fabric marker and note where they cross.
- Lay the fabric face-up over the board, matching centre points, and check it's square using a ruler.
- Flip the board over. Fold the fabric over the back and place a pin into the side of the foamboard at the centre of the top edge, then the bottom edge, pulling gently taut as you go. Repeat on the left and right edges.
- Working out from the centre, continue pinning along each edge about 1-2 cm apart, alternating top/bottom and left/right to keep tension even.
- Once pinned, check that the cross stitch is evenely tensioned, and the stitching is straight and not distorted by the stretching.
Method 2: Taping (quicker, better for smaller or lightweight pieces)
- Cut your mount or foam board to size. (about 4cm smaller than the frame opening size).
- Centre the fabric face-down on the back of the board.
- Starting with the top edge, pull gently to remove creases and secure with a continuous strip of acid-free framer's tape (or overlapping short strips with no more than 2–3cm gaps). Repeat on the bottom, then the sides, keeping tension even on all sides. Reinforce the corners with an extra piece of tape once all sides are secure.
Tip: Do a test run on a spare scrap of fabric first if it's your first time. It'll build your confidence before you commit your finished piece.
Step 3: Keep the Fabric Off the Glass
This is one of the most important, and most overlooked, parts of cross stitch framing. If your stitching (especially raised stitches, French knots or beadwork) touches the glass directly, moisture can become trapped and the stitches can flatten or become susceptible to mould over time.
To avoid this damage, you need a gap between the fabric and the glazing. This is usually achieved with:
- A mat board (single or double) cut with a window opening
- Spacers, fitted inside the rebate to lift the glass away from the surface
- A deep-rebate frame, which naturally allows more room for board, spacers and glazing without extra hardware
If your piece includes beadwork, Diamond Dotz, or heavily raised stitching, you'll need extra depth because a standard-depth frame may not have enough clearance. It's worth checking rebate depth before you buy a frame.
Step 4: Choose Your Frame, Mat and Glass
The frame and mat you choose can make or break the finished look:
- Frame colour/finish: Neutral tones (white, natural timber, black) tend to suit most cross stitch designs without competing with the stitching, but picking up an accent colour from your design can make it pop.
- Mat board colour: A mat that complements (rather than matches exactly) your design usually looks best. See our guide to choosing mat board colours for more detail.
- Glass type: Standard glass is fine for most pieces, but if your cross stitch will hang in direct sunlight, anti-reflective or UV-protective glass will help prevent glare and fading over time. See Is Anti-Reflective Glass Worth It?
Step 5: Assemble the Frame
Once you've got your mounted cross stitch, mat or spacers, and glazing ready, it's time to bring everything together in the frame. Getting the layering order right matters - it protects your work and keeps it sitting flat and secure.
Working from front to back, the layers should go:
- Glass or acrylic glazing: Cleaned and free of dust or fingerprints before you seal anything in.
- Mat board or spacers: Creating the gap that keeps your stitching off the glass.
- Your mounted cross stitch: The fabric pinned or laced onto its foam board from Step 2.
- Backing board: A rigid support (foam core or acid-free cardboard) behind your mounted piece to keep everything flat and hide the lacing or tape from view.
Once the layers are stacked in the frame rebate, secure them using the frame's existing hardware (points, clips or a flexible tab system, depending on your frame type) pressing them into the rebate to hold everything firmly in place without excess pressure on the fabric.
For extra protection against dust, moisture and insects, seal the back of the frame with framer's tape or acid-free kraft paper.
Finally, attach your hanging hardware (D-rings, wire, or a sawtooth hanger) to the frame (not directly to the backing board) so the weight is properly supported once it's on the wall.
DIY or Professional Framing? Here's How to Choose
DIY framing can work well for smaller, simpler pieces and is significantly cheaper if you already own or can borrow the tools. But there are trade-offs:
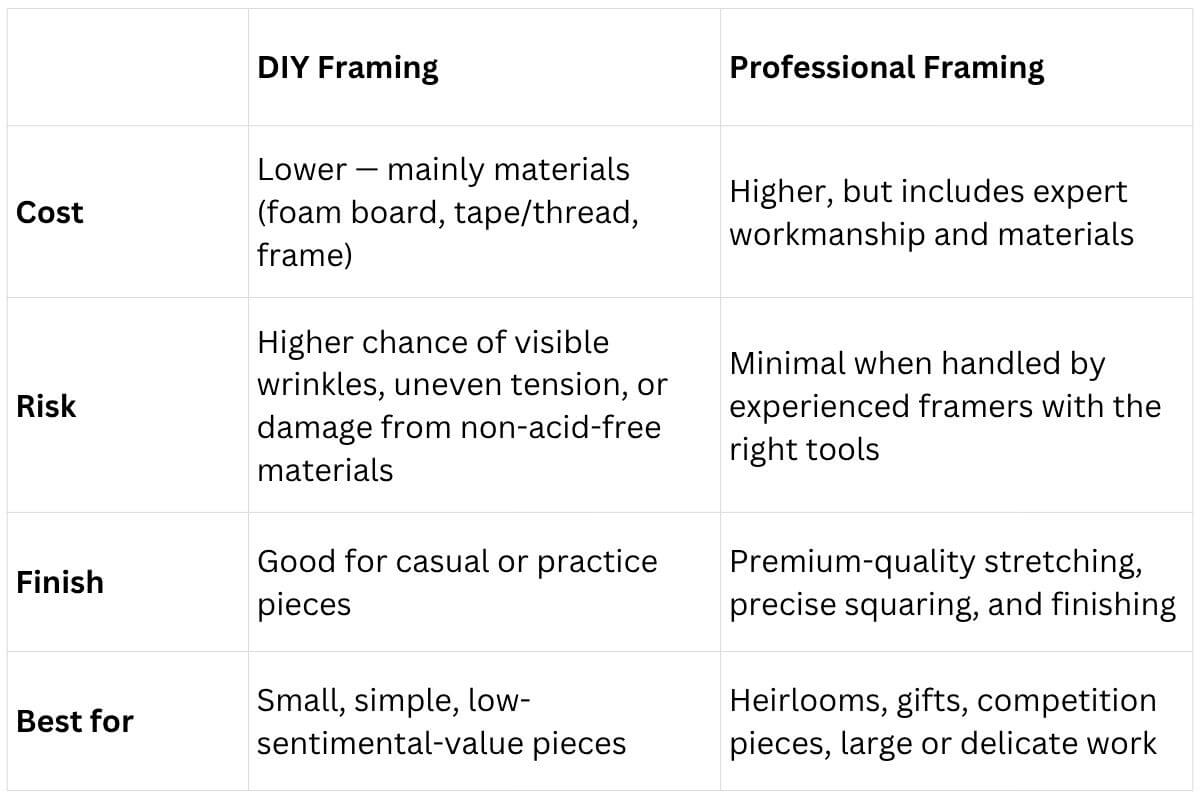
If your cross stitch represents hours of work, was a gift, or holds sentimental value (or if it includes delicate elements like beadwork or metallic thread) it's worth having it professionally mounted and framed. Incorrect tension, non-acid-free materials, or the wrong glazing can cause irreversible damage over a relatively short period of time.
Why Frame a Cross Stitch?
Cross stitching involves thousands of individual threads forming the composition of the artwork. Despite how secure these threads are, it's not uncommon for them to fray or loosen over time. Framing helps minimise this wear.
More importantly, cross stitching makes for beautiful, interesting art that's best appreciated when properly framed and displayed. These pieces represent countless hours of skill and patience. Expert framing ensures that effort is truly valued for a lifetime.
Get in Touch
Whether you'd like to try framing your cross stitch at home or would rather leave it to the experts, Frame Today's team is here to help. Our qualified framers can accurately measure your piece, recommend the right frame, mat and glazing, and stretch and mount it to professional standard, so it's protected and beautifully displayed.
Reach out to your local store today for cross stitch framing near you.