Quilting is a timeless craft that can be traced back to medieval times. While traditional quilting involves sewing pieces of fabric together, there's a unique and beautiful alternative that allows you to explore your creativity – paper quilting. The earliest forms of paper quilting are English Paper Piecing from the early 1700s where pieces of paper are cut into the desired shapes.
In this step-by-step guide, we'll walk you through the process of creating a framed paper quilting artwork that serves as a stunning piece of home decor. We'll cover everything from selecting paper piecing quilt patterns and paper quilting designs to quilting paper piecing instructions.
Materials You'll Need
- Paper piecing quilt patterns: Before you begin, you'll need to choose a paper piecing quilt pattern that suits your taste and the theme of your project. These patterns can be found in books, online resources or you can create your own.
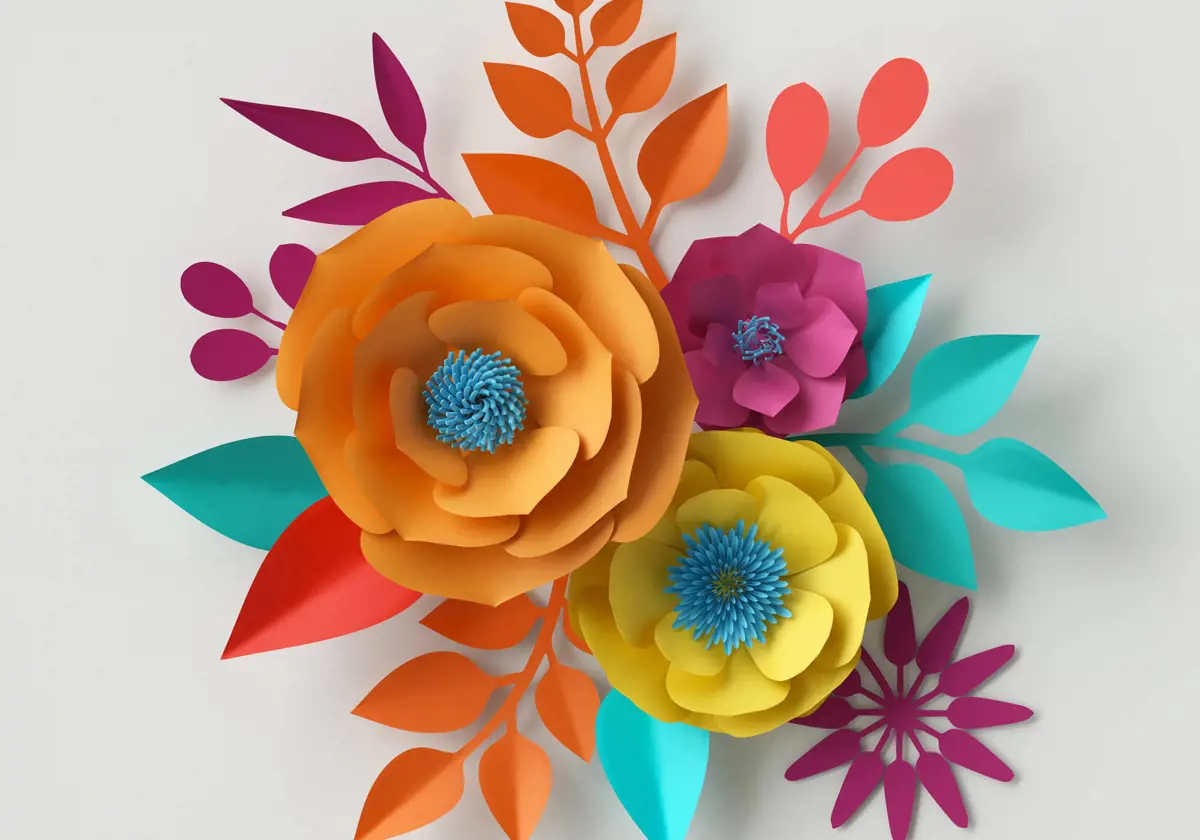
- Paper quilting designs: Select the designs you want to incorporate into your paper quilting artwork. These designs can range from simple geometric shapes to intricate images.
- Quilting paper piecing instructions: Find step-by-step instructions for paper piecing to help guide you through the process.
- Coloured and patterned paper: Gather a variety of coloured and patterned papers and consider using high-quality acid-free paper to ensure the longevity of your artwork.
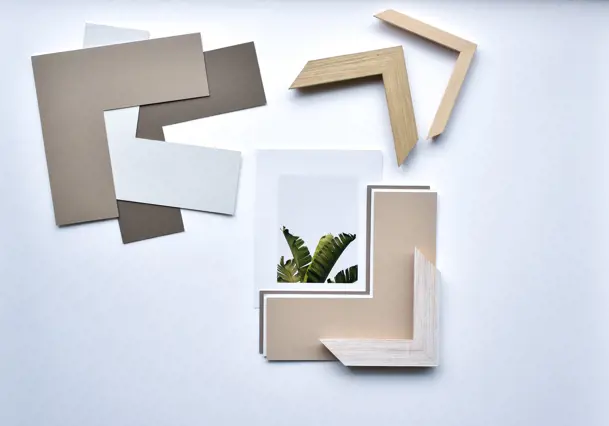
- Card stock or mounting board: This will be used as the base for your artwork so choose a size that fits your frame.
- Cutting tools: You'll need scissors, a craft knife or a paper cutter for precision cutting.
- Glue or adhesive: Opt for acid-free, archival quality adhesive to preserve your artwork.
- Ruler and cutting mat: These tools will help you measure and cut your paper accurately.
- Framing: Select a frame that complements your artwork's theme and the size of your paper quilting design.
Step 1: Select and Prepare Your Design
Begin by selecting the paper quilting design and paper piecing quilt pattern that you want to work with. Make sure your design is appropriately sized for your frame. If needed, adjust the size to fit your chosen card stock or mounting board.
Step 2: Cut Your Paper
Using your cutting tools, carefully cut the coloured and patterned paper into the shapes required for your design. Be precise, as accuracy is key in paper quilting.
Step 3: Prepare Your Base
Attach the card stock or mounting board to your frame's backing board. This will provide stability for your artwork and ensure it fits perfectly within your frame. You can visit any of our framing stores and we can cut a backing board to size.
Step 4: Start Piecing
Now it's time to begin the paper piecing process. Follow the quilting paper piecing instructions you've chosen to piece your design together. Start from the centre and work your way out, adhering each paper piece to the base.
Step 5: Layer and Add Dimension
To create depth and texture in your artwork, layer different paper pieces. Use adhesive foam squares or double-sided tape to lift certain elements off the base.
Step 6: Assemble Your Design
Continue to piece your design together, working methodically and referencing your chosen paper piecing quilt pattern. Take your time to ensure precision.
Step 7: Frame Your Artwork
Once your paper quilting artwork is complete, carefully place it within your selected frame. Ensure that it's secured in place and that the design is centered. To make your finished artwork extra special consider custom framing.
Step 8: Display and Cherish
Now that your framed paper quilting artwork is framed and ready to hang you can find the perfect spot to display it in your home. Hang it on a prominent wall or place it on a shelf where it can be admired by all. Remember to keep your artwork out of direct sunlight to prevent fading.

Creating a framed paper quilting artwork is a labour of love that combines the art of quilting with the beauty of paper crafting. By carefully selecting your paper piecing quilt patterns and paper quilting designs, following quilting paper piecing instructions and displaying your finished framed masterpiece, you can cherish your memories in a truly unique and artistic way. So, grab your materials, let your creativity flow, and embark on a journey to create a paper quilting masterpiece that you will cherish for years to come.